Follow the steps in this walkthrough to digitize any audio you’d like. If you have any questions, please ask!
Workstation #5, located in the Lewis Music Library, is outfitted with the hardware and software necessary to digitize audio from a record or cassette.
Please see the section related to the Digital Audio Workstation (DAW) of your choice for specific instructions.
This workstation has two Digital Audio Workstations installed; Reaper and Logic Pro. Both DAW’s have detailed instructions on how to record audio with either the turntable or cassette player.
When Reaper starts, it will prompt that an audio device is not yet selected.
Choose yes, from this menu, choose either the “Turntable” or “Cassette Player”.
If prompted to download a new version, close the window.
Click ok when asked for microphone access.
If not prompted on startup to select an audio device or if you selected the wrong one, follow these steps:
Find and click the REAPER tab in the top left corner.
Then Preferences > Audio > Device > Audio Device drop down menu > Select “Turntable” or “Cassette Player”.
Find the Track tab, and click “Insert New Track”
A gray track box will appear, this is where the audio will be recorded.
In order to hear the audio, “arming” the track is necessary. This prepares the track for recording.
This is done by pressing the red circular button on the track found here:
After “arming” the track, it is ready to record and playback any audio. The red audio meter will become active when the track is armed as well.
Before moving on, if detailed use of either the turntable or cassette player is needed, please reference the “Turntable Instructions” or “Cassette Player Instruction” section at the end of the guide.
After the device is on and the track is armed, press play on the chosen device.
Sound should be coming through the headphones.
If not, check the preferred audio device and that the track is armed.
In order to record the desired audio, the big red “Record” button towards the bottom left, needs to be pressed.
The “Record” button can be found here, just below the audio track.

Ensure that the track is armed and the audio is coming through the headphones.
In order to capture all of the audio needed. Start recording the track BEFORE pressing play on either the Turntable or Cassette Player.
Extra audio can always be edited out, so don’t be afraid to have silence before the desired audio is recorded.
Once the desired audio is recorded press the “Record” button again to stop recording.
If desired, now is the time to edit out any silences before and after the recorded audio.
To export the audio, find the File tab at the top, then click Render…
The “Render to File” menu will pop up with the directory location, file name, and sound sample options.
Choose the desired save location, name the file, and click render.
Check the audio file for the desired audio
Save the project to a usb drive if needed for later use.
Don’t forget to save the recorded audio to a usb drive or online!
When Logic starts, a window appears to choose a project.
Choose “Empty Project”
Another window appears for the track type.
Choose the audio track with the blue microphone symbol.
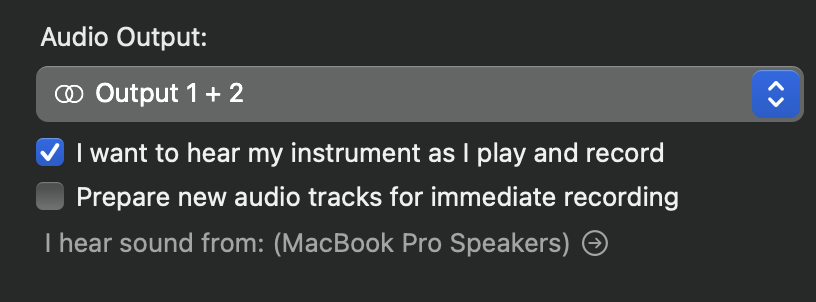
*IMPORTANT* - Under the Audio Output drop down menu, find the “I want to hear my instrument as I play and record” button, make sure this is selected.
Find and click Logic Pro in the top left corner.
Then Preferences > Audio > Click Input Device > Choose “Turntable” or “Cassette Player”.
Also under the Audio settings, select Headphones as the Output Device.
Click Apply
A gray audio track box will appear, this is the track where the recording will take place.
Check for the orange “Input Monitoring” button and that it is turned on.
This is also where the track is “armed” for recording, press the red circular button to “arm” the track. The button will begin blinking.
Before moving on, if detailed use of either the turntable or cassette player is needed, please reference the “Turntable Instructions” or “Cassette Player Instruction” section at the end of the guide.
After the device is on and the track is armed, press play on the chosen device.
Sound should be coming through the headphones.
If not, check the selected preferred audio device, that the “Input Monitoring” is on, and the computer volume is turned up.
In order to record the desired audio, the big red “Record” button towards the middle of the top, needs to be pressed.
The “Record” button looks like this, at the top of the page.
In order to capture all of the audio needed. Start recording the track BEFORE pressing play on either the Turntable or Cassette Player.
Extra audio can always be edited out, so don’t be afraid to have silence before the desired audio is recorded.
Once the desired audio is recorded press the “Stop” button to stop recording.
If desired, now is the time to edit out any silences before and after the recorded audio.
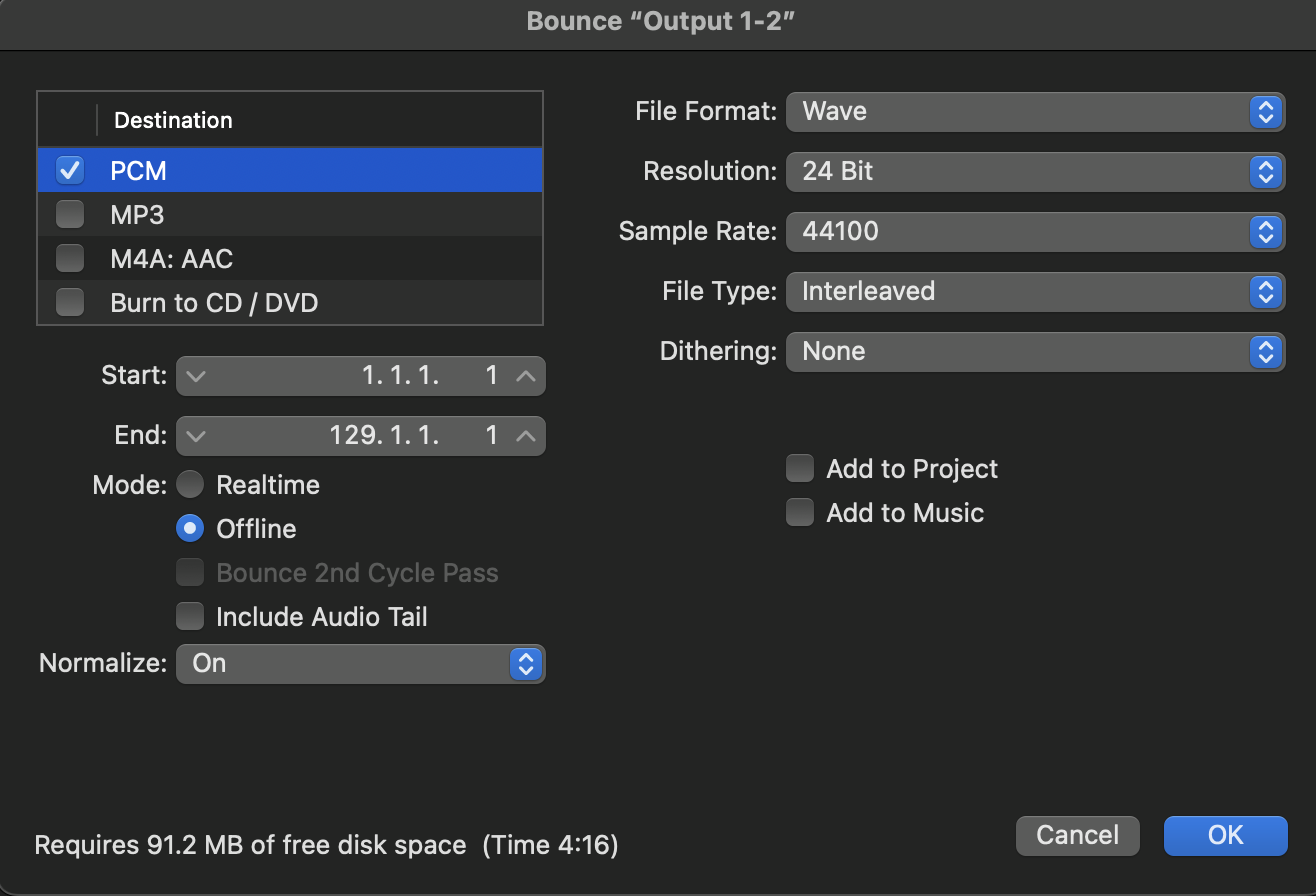
To export the audio, find the File tab at the top, then click “Bounce Project or Section”.
A window with sound options will appear. Unless there are specific details needed, just click “Ok”
The next window is where you choose the file name and where it will be saved.
Save the project to a usb drive if needed for later use.
Don’t forget to save the recorded audio to a usb drive or online!